Contact Email

My contact email: 1tgoding@gmail.com

Monday, February 20, 2023

Painting the Bilge

 It was so good to finally cover all that plywood work, sanding, coating with epoxy, laying glass, more sanding, more epoxy coats, more sanding and finally............PAINT.


I masked up the lower hull just above the fillets and around the centerboard case.


I decided to paint the bilge and interior cabin area in a semi-gloss white. I chose "Aquacoat" from Drive Marine Services in Sydney.

AQUACOTE is BoatCraft Pacific’s range of technically advanced water based polyurethane topcoats.  These highly durable coatings represent the newest technology available, offering leading edge protective coatings which set new standards in ease of use, environmental safety, and especially for protection of the health of applicators.

Here is my step-by-step process painting the lower hull area using "Aquacoat".

1: Climate and Environment.

The location was under cover in my garage, a warm day with low humidity. I wet down the concrete floor around and under the boat and commenced in the morning.

2: Prepared the roller, brush and bucket of water with a clean absorbent cloth.

3: Thoroughly stirred the paint ensuring all the pigment on the bottom was well mixed in.

4: Then thoroughly mixed 100 ml of paint with 45 drops of "crosslinker" and placed in a roller tray.

5: I wiped down the first section between BH 2 and Floor 3 with the damp cloth and wetted out the roller and brush with water.

6: The corners and tight areas are painted by brush and the hull floor and sides painted by roller.

7: Each section then wetted out with the clean damp cloth and painted.

Pictures of the First coat.


Second coat.


Third coat and Electrical conduit install.


Thats the end of twelve months of construction............The first year

Tuesday, February 14, 2023

Lower interior hull sanded


After eight hours of "Oh Glorius Sanding"(To use one of Madd's sayings from "Sail Life" on YouTube) I finally had the area ready for painting.

I rough sanded the hull beneath the floorboard level and fine sanded the remaining lower hull and sides, the cabin interior.


As mentioned by many previous builders the sanding is quite a labor-intensive challenge to ensure a smooth finish on the glass overlaps and fillets.

Due to a good layer of epoxy over the glass I was fortunate not to sand into the glass weave.

I cut holes in the floors and bulkheads for two electrical conduits to run the length of the boat, it's much easier to do this during the build. I am still researching what electrical gadgets I will be installing so having the extra capacity will be helpful. The conduits will run in the small gap on the outer edge which leaves the deeper section for storage and lead ballast. 


Tuesday, December 20, 2022

Floorboard Construction complete almost.


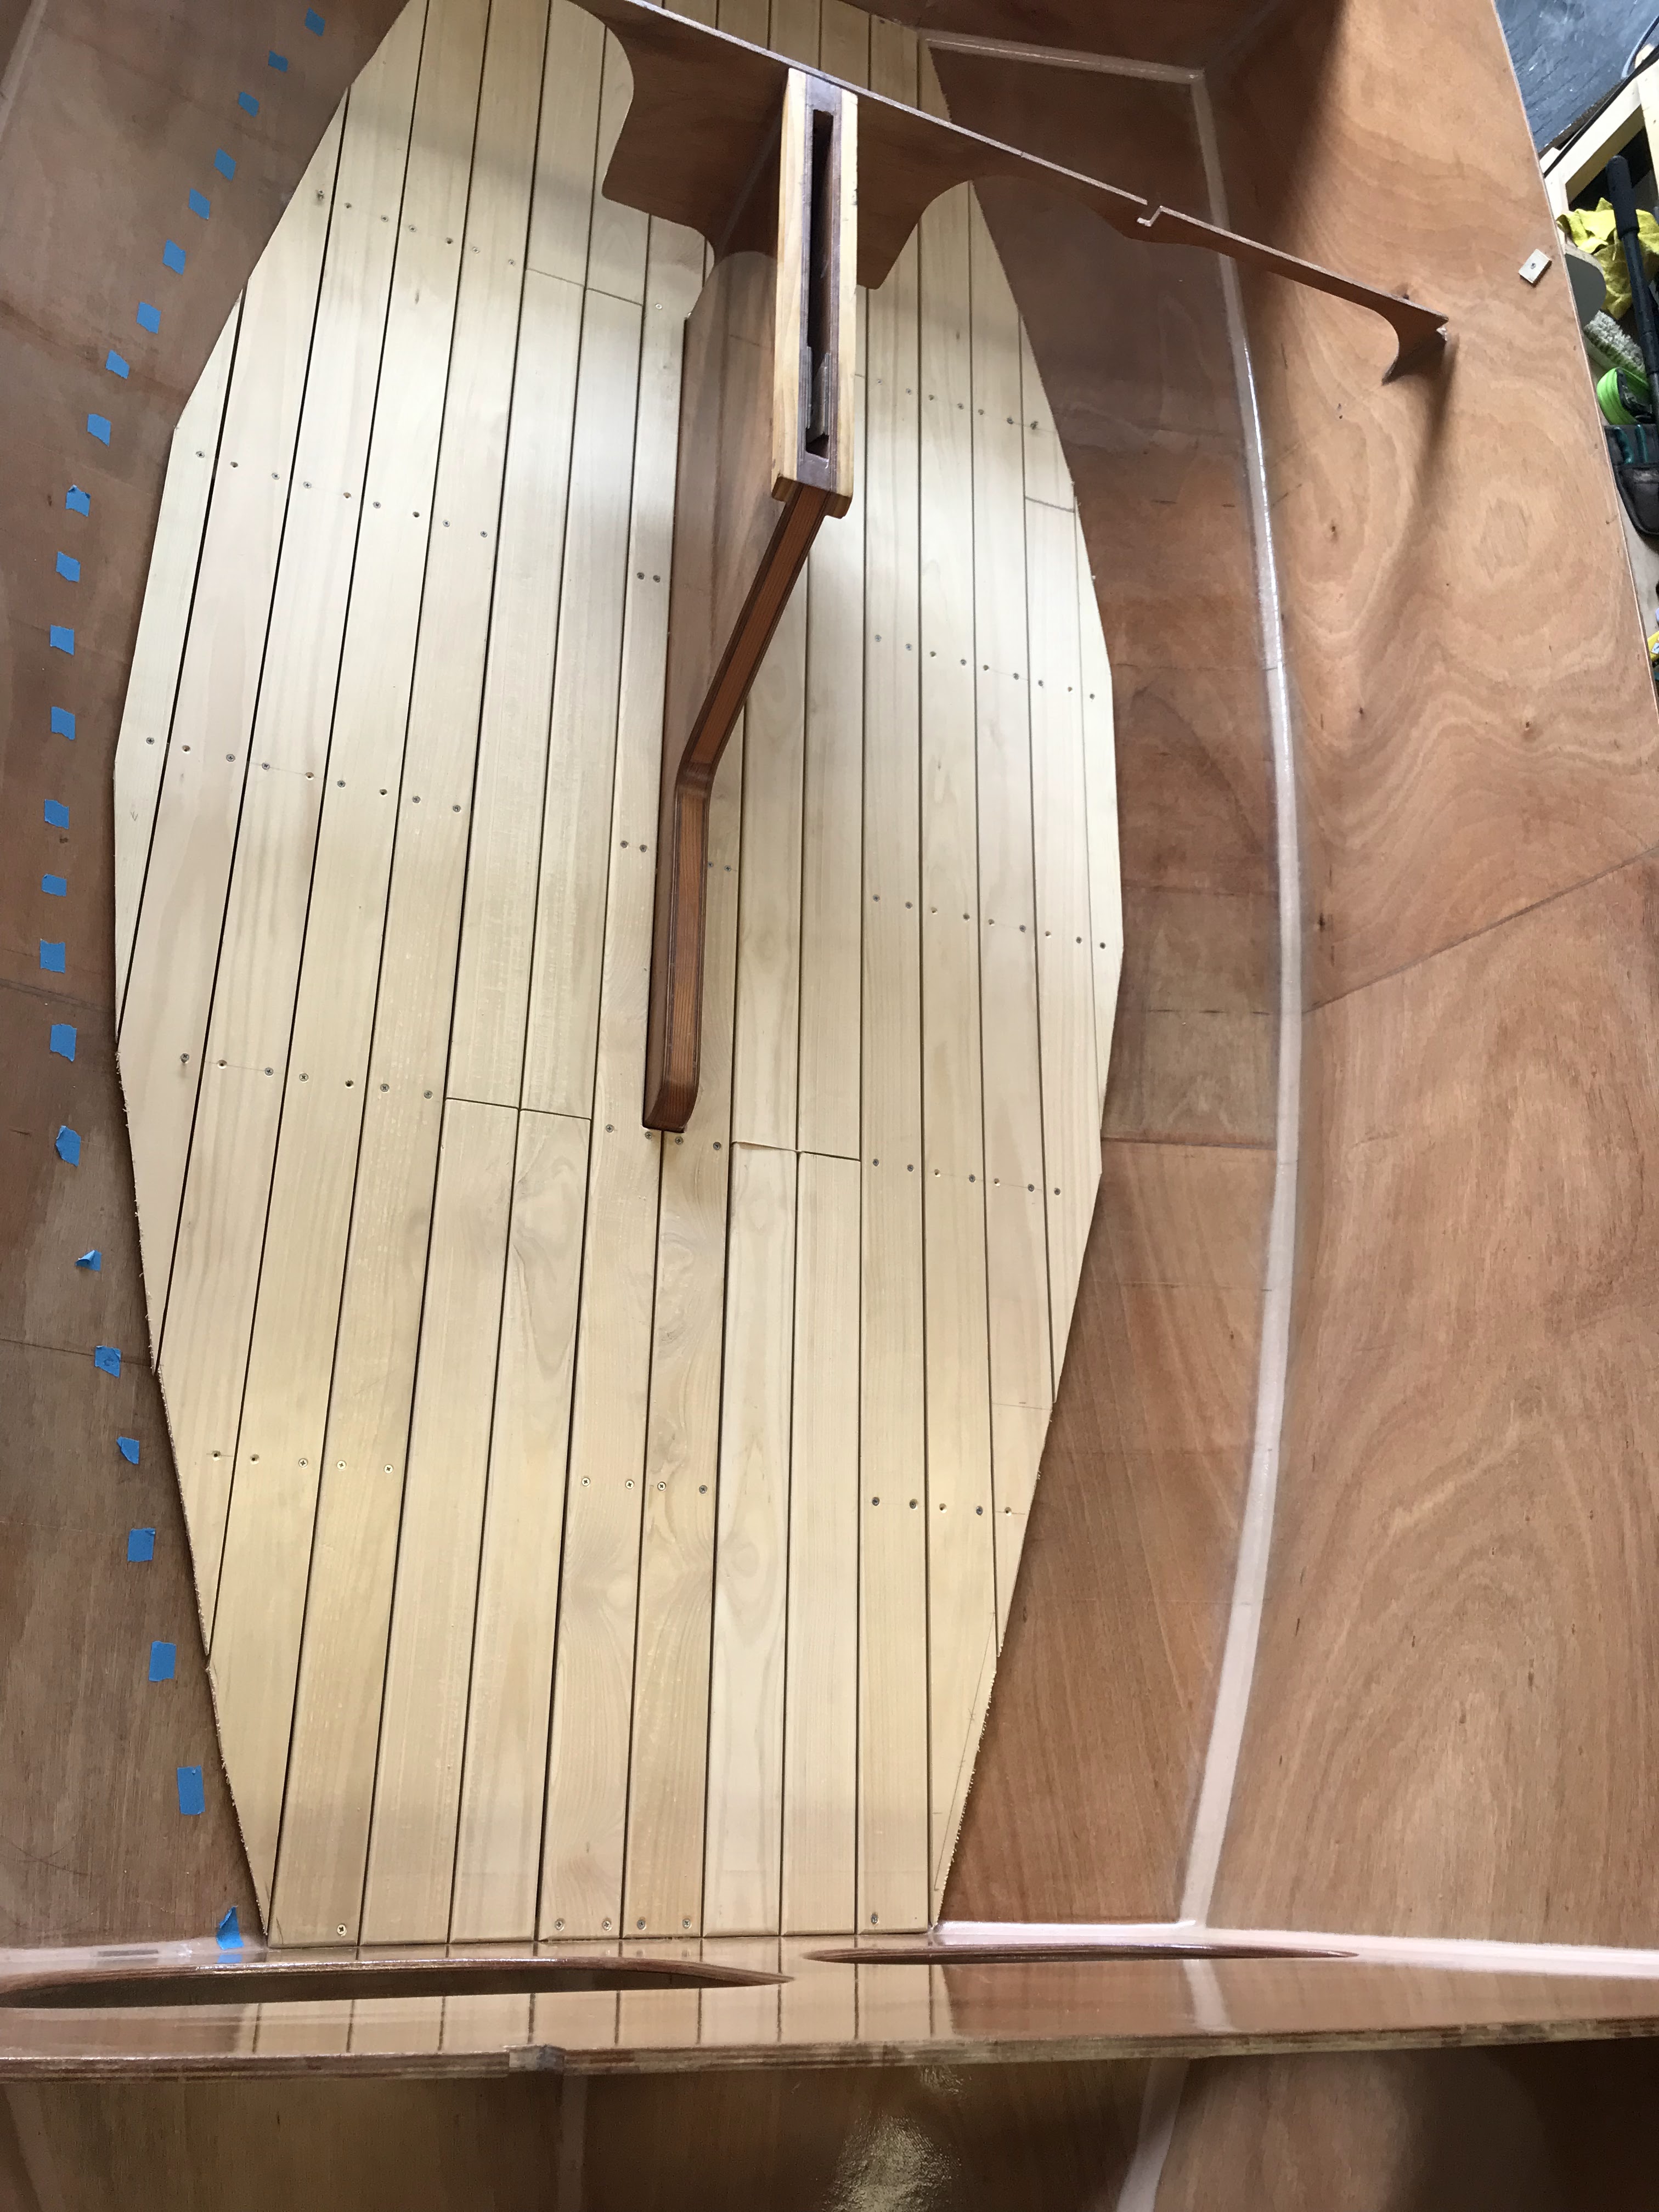
Now it's time to put a smooth curve on the outer floorboard edges and ends. A thin timber off cut is used to trace a nice sweeping pencil line. I started with the small outermost floorboard and gently pulled the thin timber off cut in towards BH 2 forward and BH 8 Aft. I used 3mm thick nails in the gaps between the floorboards to hold the thin timber in place.


Each board is removed and planed down to the line, trial fitted, edges routed round and fully sanded.
This is really nice timber to work with, I can't wait to see how the grain looks after the final finish.


Here are the finished floorboards with six access hatches cut in.


The six access hatches require some hardware so it's off to Whitworths (An Aussie ship Chandlery store).
Armed with 14 Butt hinges, 56 
countersunk screws and 6 Teak
finger rings it's time to do some fitting out.


The hatches required a routed section to ensure the butt hinges are flush with the floorboards. I clamped a template made from scrap 7mm thick ply to each access hatch and routed the exact external size of the butt hinge.


Holes are drilled to secure the decorative teak finger rings and all the parts screwed together to form the hinged access hatches. Two down four to go.

Next is an all-round coat of epoxy and then several layers of clear gloss finish. That should bring out the beautiful grain of the Queensland Hoop Pine.


FLOORBOARD TIP


If you find the floorboard ends
between BH8 and Floor 7 curl 
up slightly due to the distance,

then...............


Screw a small piece of ply to the underside of the offending floorboard at the end and slide it under the neighboring
secured floorboard.


This will pull the bend down and level with the secured floorboard
resulting in perfect level flooboards.


Thats the end of the eleventh month of construction.......


Saturday, December 10, 2022

Floorboards cont.


The two middle centerboards are clamped in place with spacer jigs to maintain the 3mm gap between each floorboard. The spacer jigs are constructed from strips of ply with two 3mm diam nails either end.


The boards are drilled with a countersinking bit using the location template and then screwed into place.
I used 178 X 30 mm long SS countersunk screws to secure all the floorboards. I shortened some of the screws to 25mm for the outer floorboards where the floors merge into the hull bottom.


It's time to decide where and how many access sections to build into the floorboards. Personally, I would like to be able access the entire under floor section of the hull.


I made the decision to install six access hatches. Two between BH 2 and floor 4, Two between floor 4 and floor 7 and two between floor 7 and BH 8. My rationale for this is to provide access to the entire bilge on both sides of the centerboard case. The space will provide limited under floor storage but most importantly allow easy access and relocation of ballast boxes when trimming the boat.


Each access hatch was set up on two raised pieces of timber and separated by two spacer jigs from below. They are held together with clamps and cleats are drilled and screwed into place.


Time to rough fit the outer curved floorboards, I used the same method as Stephen on the "Eynsham PocketShip Blog" to mark the cuts where the boards meet the hull bottom, thanks Stephen. I used a plywood template that was the same width and thickness as the floorboards and long enough to sit on at least two floor frames. The 3mm gap template was placed between the template and the adjacent fixed board. 


Then the template was moved up until it hit the hull, a cross was marked and then the triangular measurement was transferred onto the end of the floorboard. 

For a more detailed explanation of this process check out Stephen's blog:

http://www.theeynshampocketship.co.uk/


Tuesday, November 29, 2022

Floorboards

 At last, time do some carpentry.

For the floorboards I purchased six lengths of Queensland Hoop Pine 3.6m x 250mm x 25mm. Although classed as softwood the timber is dense and weighty and has a beautiful grain, I think it will make perfect floorboards plus the off cuts can be milled up for cleats etc.

As the purchased timbers dimensions were 250mm wide by 25mm thick they required considerable milling. 

I cut two lengths a bit over 76.2mm wide on the bench saw and the proceeded to mill down the thickness but unfortunately, my trusty old thicknesser/planer blew up, so it was off to the local hardware store for a new one.

Time to make some dust.


Here is the first cut of floorboards ready to be trimmed to fit around the centerboard case and edge routed.


The first two center flooring boards are trimmed, and edge routed and sitting in place around the centerboard case.


To fix the boards I made some simple jigs. I purchased a countersinking drill and a box of 200 stainless steel self-taping screws.


This is the drill alignment jig; the top & bottom holes will line up for the board ends and the center holes will line up the floors. 

The jig from a different angle showing the spacer screwed and glued into the ply. I used two wooden paddle pop sticks glued together to provide the 3 mm gap between the floorboards.


Here is my jig arsenal, consisting of the drill jig, countersunk drill bit, spacer jigs with 3mm nails and two paddle pop sticks glued together to form a 3mm thickness.


Before I start screwing the floorboards into place, I needed to glue the last two cleats to BH 2 & BH 8. I purposely left these cleats off to ensure they lined up accurately with the remaining floors. As indicated in previous blogs there was an error in the plans for the cleat height on BH 2. 


Thats the end of the tenth month of construction..............

More sanding and Epoxy coats

 Well, I'm back from gallivanting around with the Mrs. and feeling rejuvenated so it's back to the build.


I know many builders have said it before, but it can't be underestimated the amount of sanding required. 


To make the process a little easier here are my sanding tips:
  • Firstly, and most importantly use appropriate PPE gear.
  • To reduce climbing in and out of the boat keep everything close, either in the boat or on a tray or shelf within arm's reach.

  • Use a sander pad on your oscillating sander it gives better disc adhesion and prolongs the sander base plate.


  • Regularly clean the sanding discs, I use a combination of compressed air and sandpaper cleaning block.....BUT most importantly change the paper often (Keep a good stock as you will go through heaps)


Turn the stereo on and up loud with your favorite music.


After thoroughly cleaning the sanded area, I applied two more coats of epoxy wet on wet using a foam roller in an ice cream container.


I checked off the epoxy coating process on a sheet divided into the segments of the hull.


Finally, the epoxy is completed. The bilge area below the floorboards will be painted but I am contemplating gluing marine hull lining carpet to the area between the floorboards and the gunwales.


Friday, November 4, 2022

Time out from Build


Hi to all PocketShip builders & enthusiasts, just advising of a short delay in building while my wife & I take a short holiday.

Look forward to getting back into the build in mid-November

Cheers from Terry