Now it's time to mill up the stringers and sheer clamps for the cockpit seat backs. I used 40mm x 19 mm knot free spruce from the local hardware.

I set my table saw blade to 72 degrees.

...and ran two 2.4m long x 40mm wide spruce through.
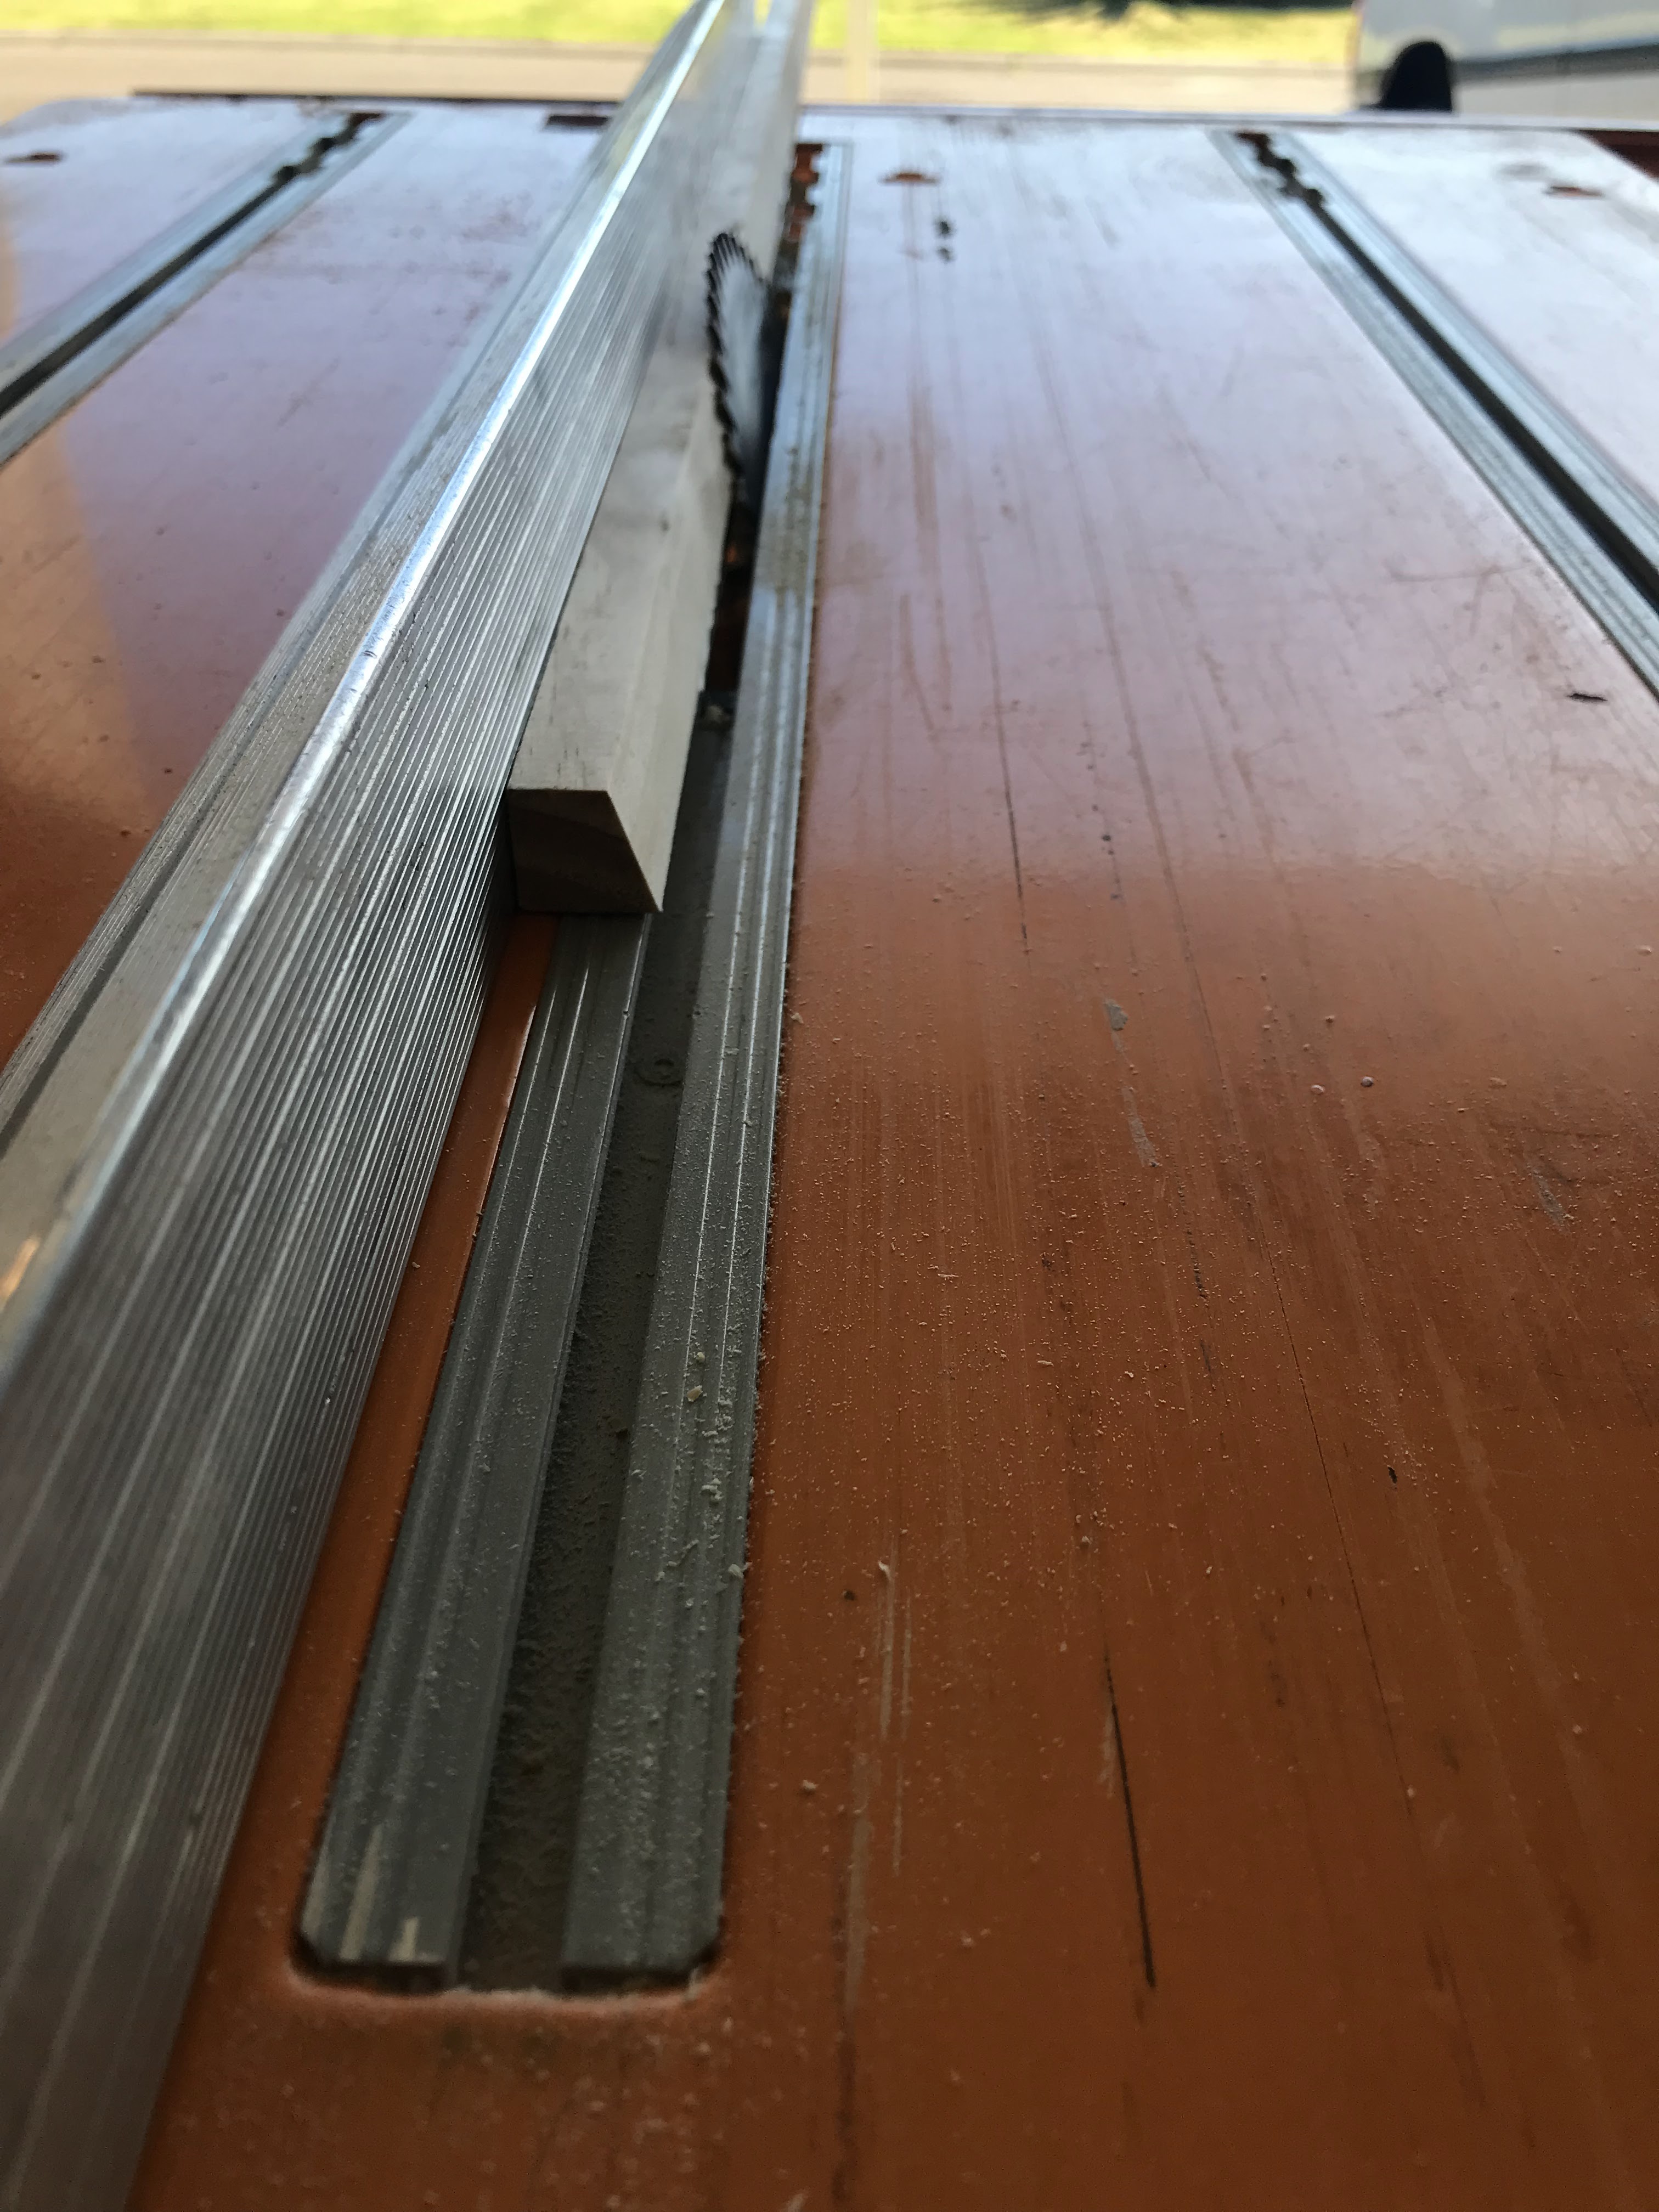
This produced the four angled stringers required for the seat backs. The saw was set back to 90 degrees for the two sheer clamps on the upper outer edge.

The stringers and sheer clamps were run through a thicknesser to 13mm.

All the stringers are ready to be glued in place.

The port & starboard 72-degree lower stringers are glued in place, small screws and weights maintain a nice curve.

Two temporary frames are cut from scrap and propped near the transom.

The upper stringer and sheer clamp is glued in place on the starboard side and held with weights and clamps. Small adjustments are made to the recesses in the seat back frames to fit the stringers and sheer clamp.

When the epoxy dried, I used a combination of belt sander, block plane and orbital sander to reduce the height of the stringers to the same level as the hull side decks. A long spirit level was layed athwartships to ensure the seat back stringers were level. A nice pleasing to the eye curve is maintained for the seat back tops.

I made a cardboard template for the transom skirt for three reasons. firstly, A cardboard template is easy to bend in place than 9mm plywood, Secondly, the placement of the cardboard template with cut outs for the seat back stringers enabled a precise line to be scribed on the stringers so when cut they fitted neatly against the transom skirt and thirdly, it enabled me to cut out the two blocks used to secure the transom skirt.
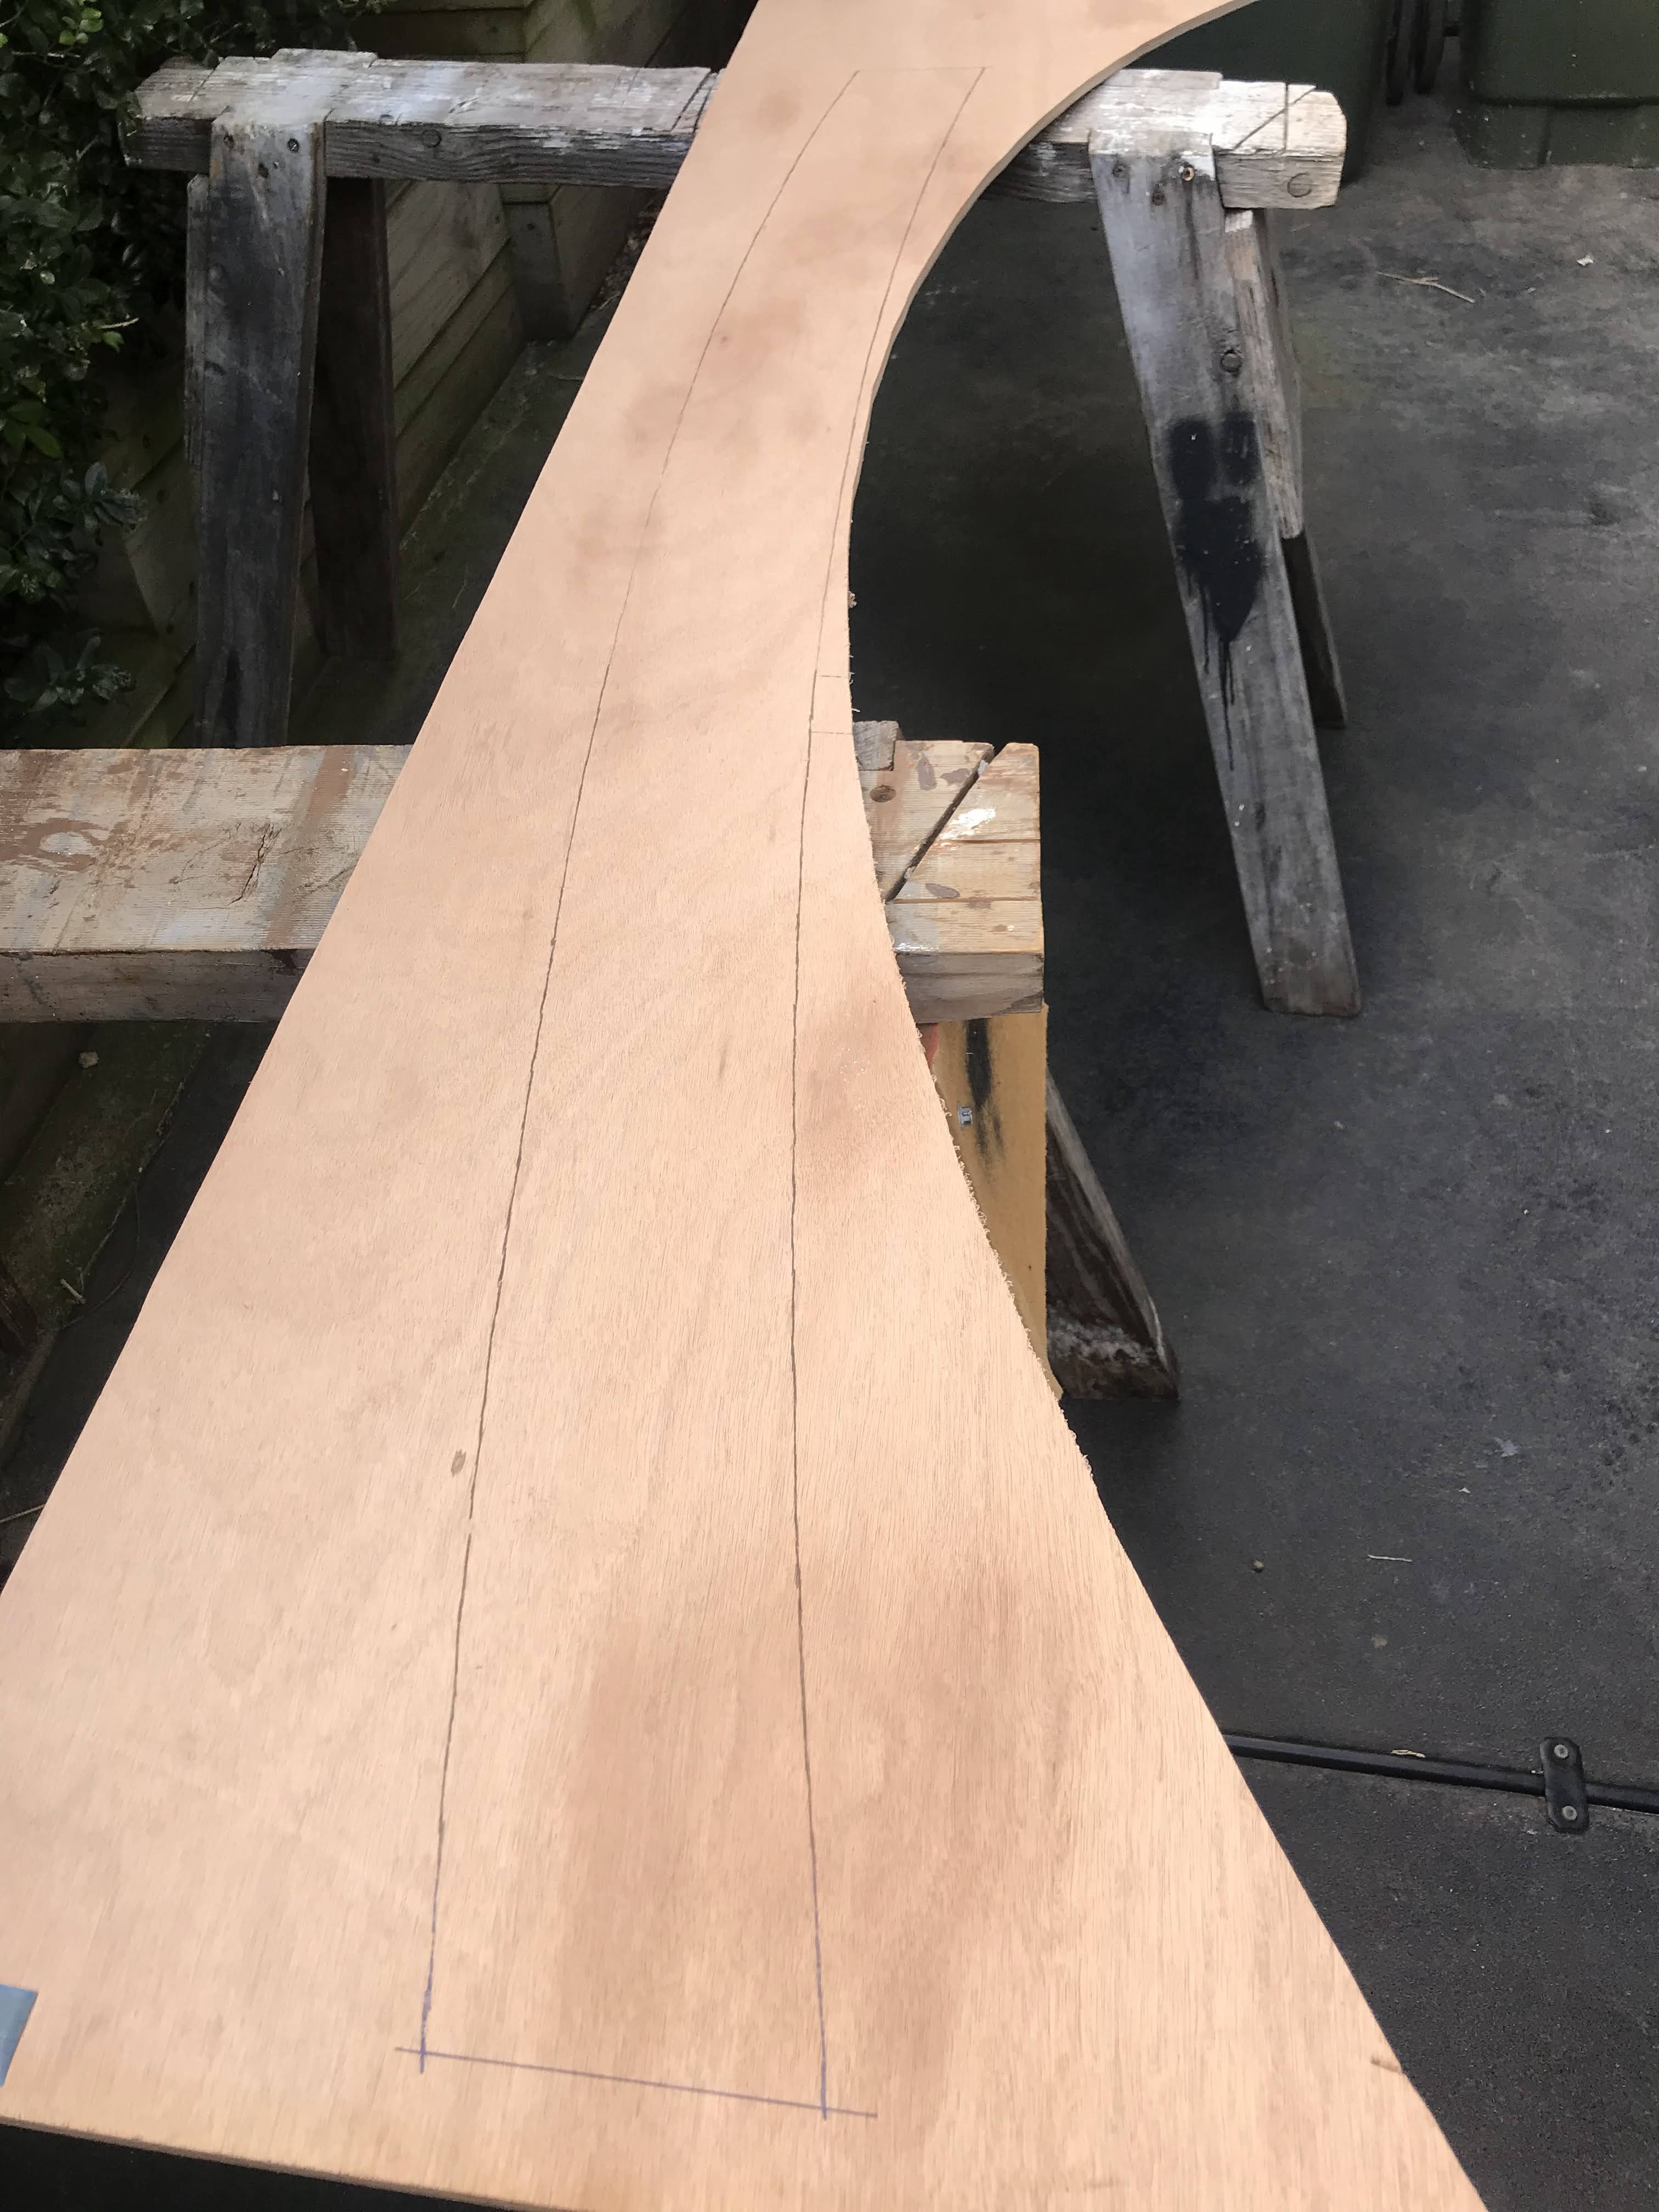
After trimming the seat back stringers and gluing the blocks the cardboard template was used to scribe the 9mm ply for the transom skirt... so n ow it's time to bring out the trusty jig saw and make some dust.

Temporary angled blocks are screwed to the transom. Starting in the middle the skirt is screwed in place and pushed and screwed to follow the top of the transom.

It just amazes me how all these straight pieces of timber when fixed in place form such beautiful curves and traditional lines, My PocketShip is evolving into a pretty girl.
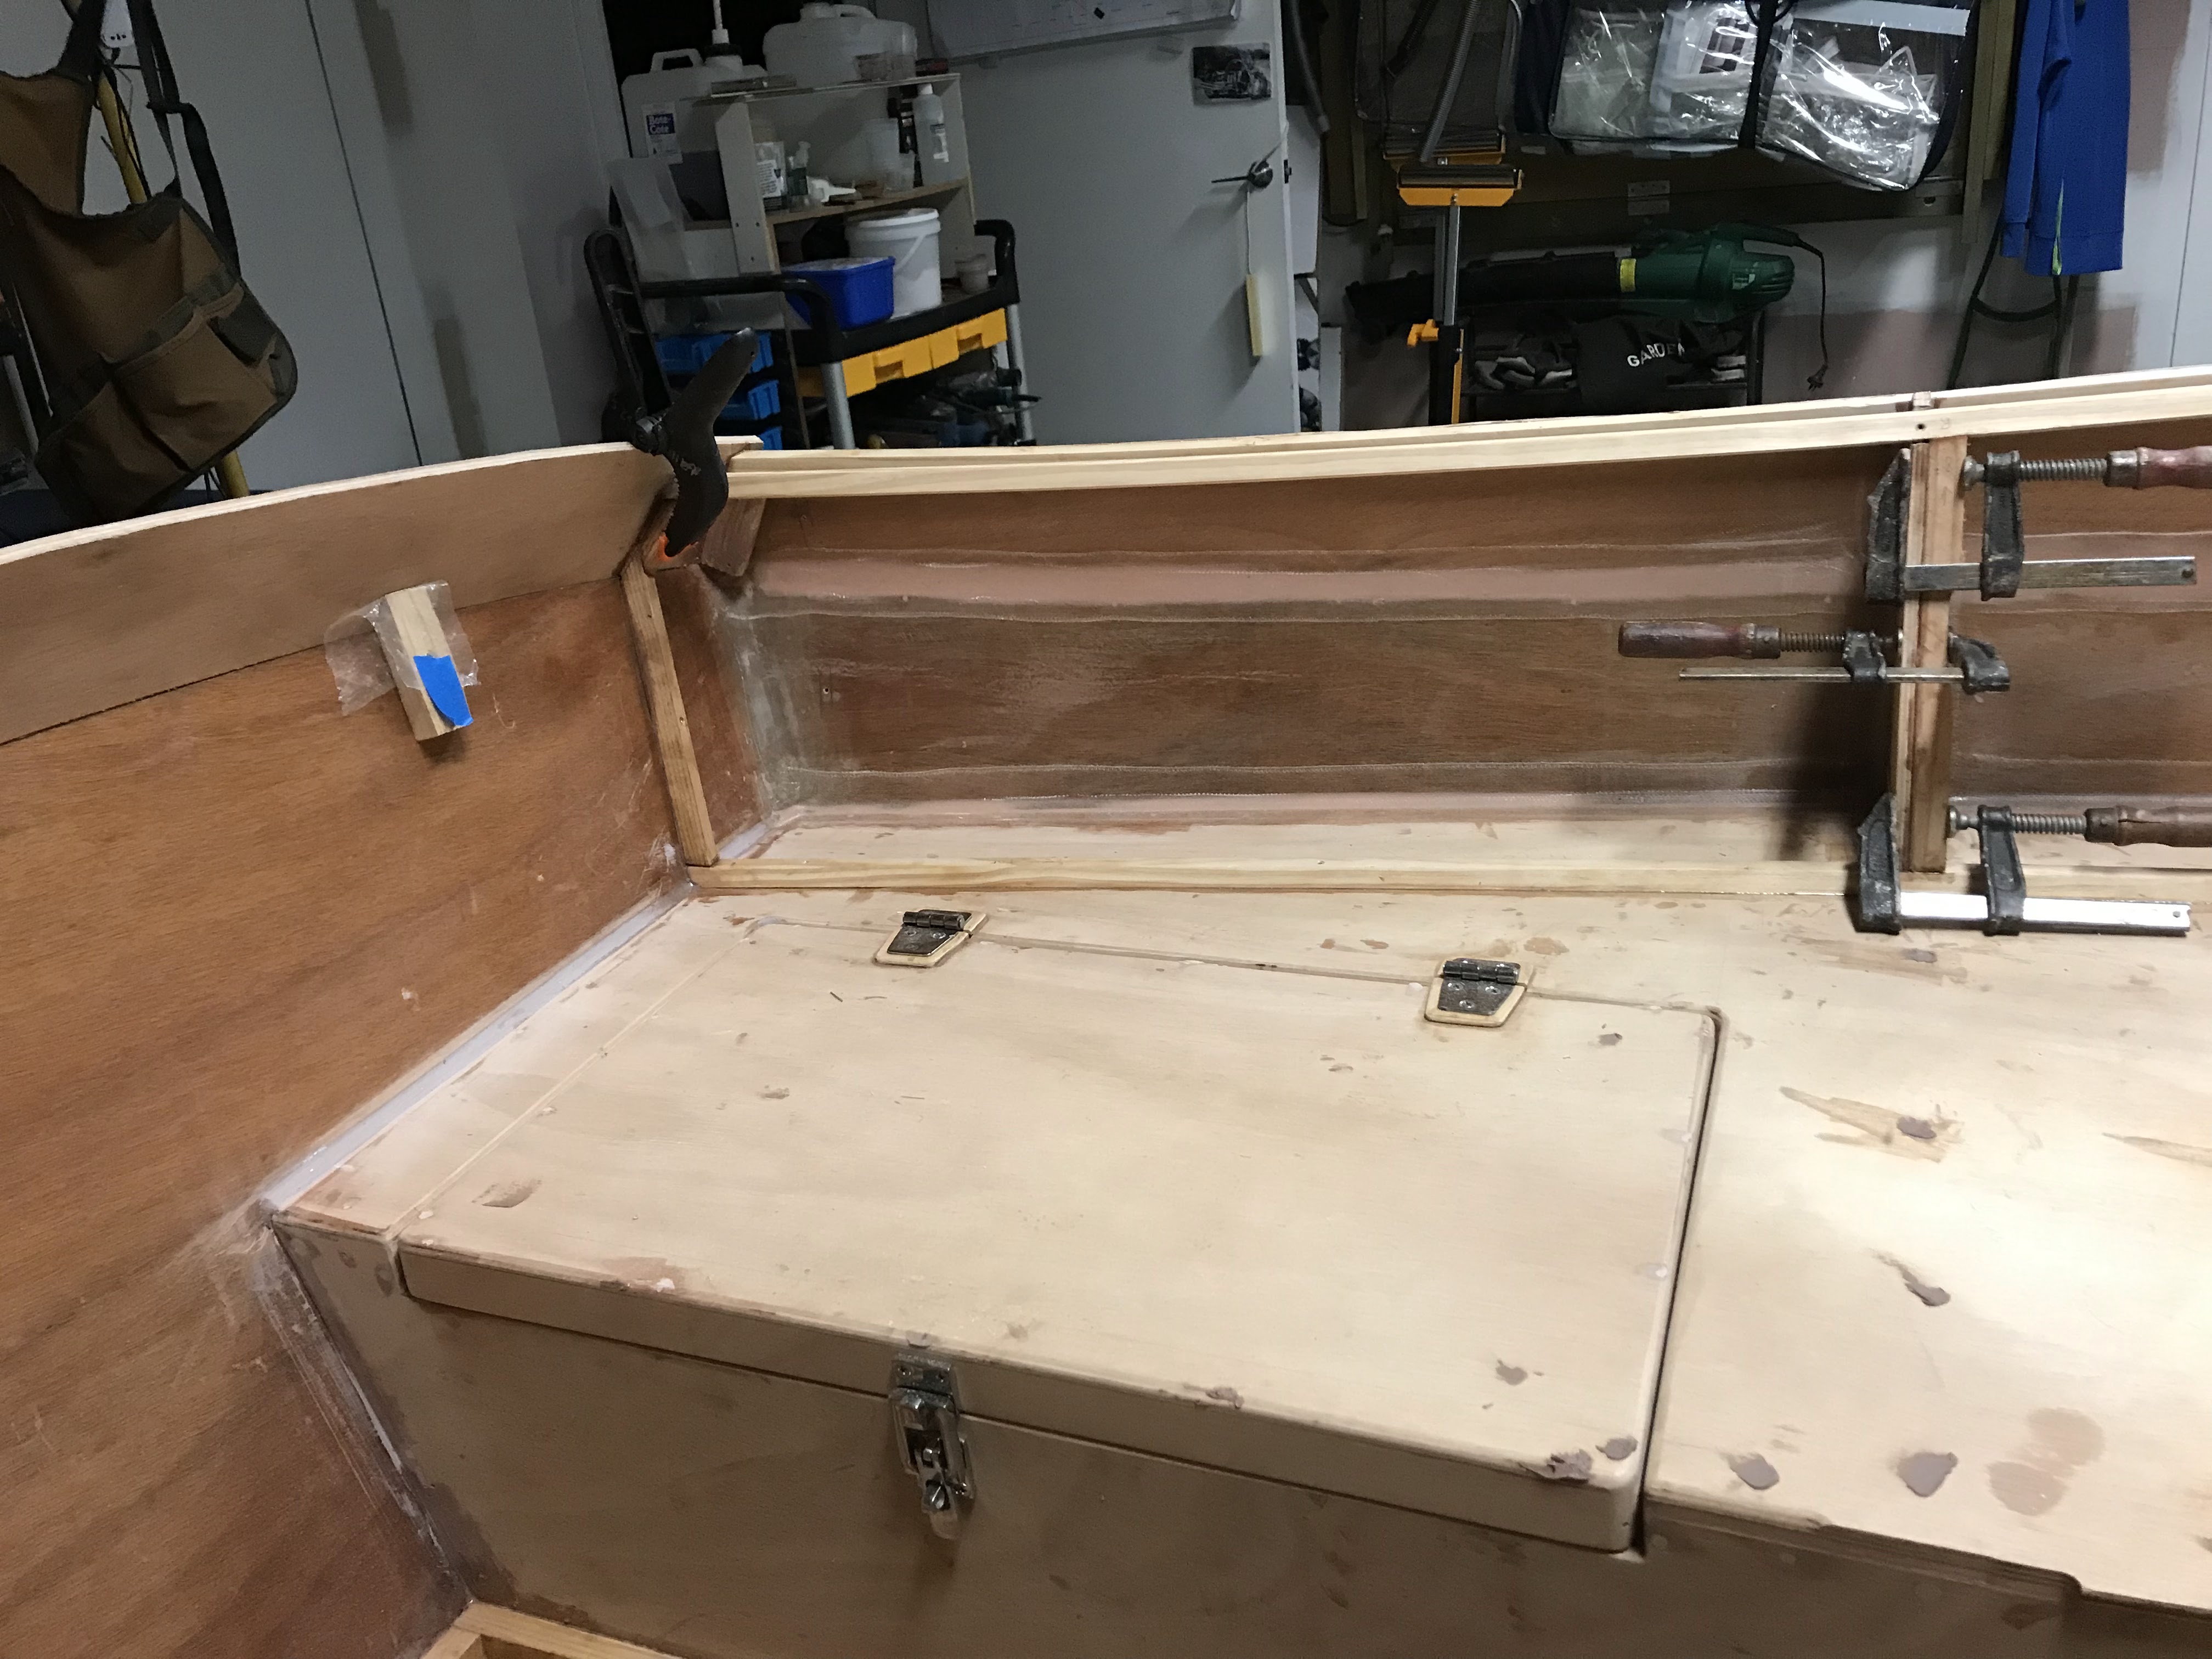

I also added an extra vertical cleat between the upper and lower stringers, in the middle of frames 2 & 3. Again, to provide support for securing the seat backs.

Time to install blocking timbers in the seat back tops for the spinnaker hardware, gallows and aft anchor cleats. I also added additional blocking Timbers at the forward end next to the cabin BH just in case I think of anything else to install. I constructed these from three pieces of scrap ply (2 x 9mm and 1 x 6mm) laminated together.


Here are the spinnaker hardware blocking timbers located either side of the seat back frames.


