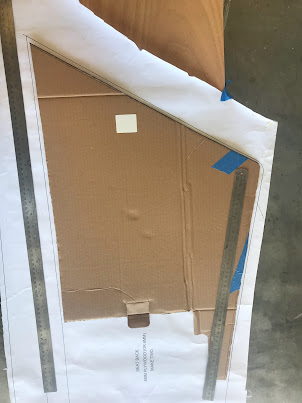
To ensure a neat fit I decided to use cardboard templates on the forward and aft end of the cockpit seat backs.
When overlaying the cardboard templates onto the paper plans a slight difference can be seen.
The cardboard templates are located in position tight against the transom and the aft cabin BH. I hot glued the templates with thin plywood strips this provided the exact length required and eliminated any gaps that some builders have experienced in the past.
The next step was to cut out the seat back rings used as stiffeners behind the seat back storage area.
A small curve is routed on the inside edge of each ring.
The rings are used as templates to cut out the storage access holes....
.....glued and held in place with weights.
BUT before I glue it in place, I have a couple of mods.
The first mod is a storage area in the first buoyancy chamber aft of the cabin BH with access from inside the cabin area. The second mod is to add electrical conduit through the foam buoyancy chambers from the cabin BH to the aft seat back storage area. This will provide future electrical access for things like the transducer lead and power to a chart plotter, USB/Cig socket DC power outlets, light power and BH compass backlight power. This will eliminate visual wiring inside the cabin area.
I would welcome any comments, suggestions or thoughts re these mods, send me an email listed at the top of the page or via the "Contacts Form" above on the right.
Mod One "The Storage Area"
To provide access to the storage area I drilled three holes using a large hole saw and a Forstner bit.

The section is removed with a renovator tool.
Here is a view from the cabin area. I have some ideas on additional storage mods to the cabin BH, watch this space.
Mod Two "Electrical Access"
Using a Forstner bit I drilled 25mm holes into the seat back frames and the lazarette area.
A length of 25mm electrical conduit is inserted through the seat back frames between the two storage areas. A smaller length of conduit is inserted through the cockpit floor and the lazarette area but raised above the deck to prevent water entering the lazarette area.
The smaller conduit is glassed into place.
Now the mods are complete there is still a significant amount of work required until I glue on the seat backs.
A layer of cloth is epoxied onto the floor of both for and aft storage areas.
The whole area is given three coats of epoxy wet on wet to ensure it is well sealed and watertight.
Now it's time to make lots of mess. No matter how much you try you can't cut up polystyrene foam without small beads going everywhere.
I had collected foam packing and foam boxes for months, now it's time to cut it up and fill the buoyancy chambers. Don't underestimate this job, its very time consuming. If I had my time over again I would use expanding foam, much easier, much quicker and NO MESS.
Anyway, I feel better now I've had my rant. here are pics of the installed foam.


