Contact Email
Tuesday, December 20, 2022
Floorboard Construction complete almost.

Saturday, December 10, 2022
Floorboards cont.
Tuesday, November 29, 2022
Floorboards
At last, time do some carpentry.
For the floorboards I purchased six lengths of Queensland Hoop Pine 3.6m x 250mm x 25mm. Although classed as softwood the timber is dense and weighty and has a beautiful grain, I think it will make perfect floorboards plus the off cuts can be milled up for cleats etc.
As the purchased timbers dimensions were 250mm wide by 25mm thick they required considerable milling.
I cut two lengths a bit over 76.2mm wide on the bench saw and the proceeded to mill down the thickness but unfortunately, my trusty old thicknesser/planer blew up, so it was off to the local hardware store for a new one.
Time to make some dust.
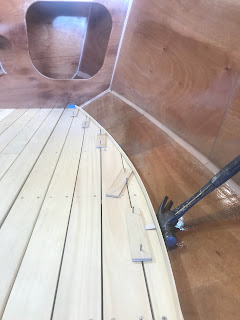
The first two center flooring boards are trimmed, and edge routed and sitting in place around the centerboard case.

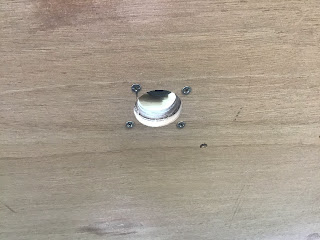
The jig from a different angle showing the spacer screwed and glued into the ply. I used two wooden paddle pop sticks glued together to provide the 3 mm gap between the floorboards.
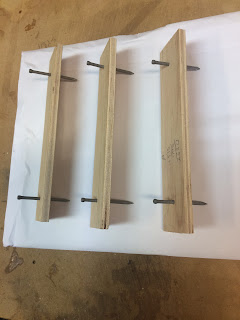
Here is my jig arsenal, consisting of the drill jig, countersunk drill bit, spacer jigs with 3mm nails and two paddle pop sticks glued together to form a 3mm thickness.
More sanding and Epoxy coats
Well, I'm back from gallivanting around with the Mrs. and feeling rejuvenated so it's back to the build.
- Firstly, and most importantly use appropriate PPE gear.
- To reduce climbing in and out of the boat keep everything close, either in the boat or on a tray or shelf within arm's reach.
- Use a sander pad on your oscillating sander it gives better disc adhesion and prolongs the sander base plate.
- Regularly clean the sanding discs, I use a combination of compressed air and sandpaper cleaning block.....BUT most importantly change the paper often (Keep a good stock as you will go through heaps)
Finally, the epoxy is completed. The bilge area below the floorboards will be painted but I am contemplating gluing marine hull lining carpet to the area between the floorboards and the gunwales.
Friday, November 4, 2022
Time out from Build
Hi to all PocketShip builders & enthusiasts, just advising of a short delay in building while my wife & I take a short holiday.
Look forward to getting back into the build in mid-November
Cheers from Terry
Friday, October 7, 2022
Cleat Router Box
In preparation for all the upcoming cleats requiring the inside exposed edge routed I knocked up a router table box from old MDF and chipboard. I left the front section open to provide access to my small Makita trimming router which was fastened to the table base. The box easily clamps to any bench and the front opening allows easy height adjustment of the router bit. A rear clamp will hold the vacuum hose for dust extraction. This will make routing the thin strips and small pieces of timber much safer, easier and quicker.
Thats the end of the nineth month of construction..........
Saturday, October 1, 2022
Forward Laminated Cleats
Laminated Cleats Between BH 1 and BH 2.
I wasn't keen on laying fillets along the join of the foredeck and hull sides between BH 1 and BH 2. The area is small and would require some gymnastic style moves whilst laying on my back, so I decided to install cleats.
Monday, September 5, 2022
Forward Anchor Locker Mod.
Anchor Chain & Rope Locker Mod,
I decided to add a compartment in the upper starboard bow section between BH 1 and the stem. The compartment will be used to store the anchor rope. The anchor will still be stored on the Port side of the foredeck, this should even the weight distribution. The mod will reduce the buoyancy by approximately a quarter but if I make it watertight and sealed it should still provide some buoyancy. The locker will have a small, hinged sealed access hatch on the foredeck in the area next to the bow sprit forward of BH 1. It will also have a round inspection port in its base to provide access to the bow eye nuts if required which eliminates the access inspection port in BH 1. A simple frame is constructed with cleat timbers and installed at an angle so water can drain from the locker back into the sea. I will add a transom plug to the drain hole to make the locker airtight when sailing.
Cleats are fitted with screws. The centerline cleats run forward to the stem and will sit beneath the lower breast hook.
Cardboard templates are made
for the plywood floor and side.


