Contact Email

My contact email: 1tgoding@gmail.com

Tuesday, August 20, 2024

The Rudder

 As it says in the manual ...... time for a bench project.


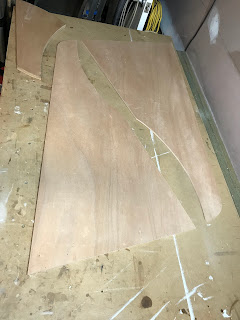
The two sides (6mm ply) and cheeks (9mm ply) are transferred from the plans and cut out with the old trusty jigsaw.


I'm having a bit of a think about the rudder, and I like the look of the edge laminates in the ply cheeks (when lacquered up bright) .......so I'm thinking of making the blocking at the top end of the rudder from ply to match the cheeks ...... it's still a thought at the moment.

The Next Day

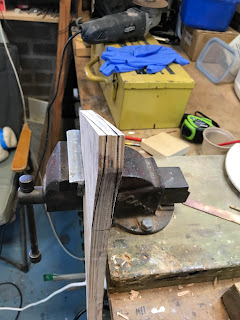
Well after a night lying in bed thinking (something I find myself doing a lot during the PocketShip build) I decided to laminate two 9mm pieces of plywood together to make the 18mm thick blocking and framing timbers for the rudder.


Here are all the pieces for the rudder (excluding the tiller) As I mentioned earlier, I wanted the upper section of the rudder bright showing the end grains of the cheeks and the end grain of the blocking timber to match.


Time to create some dust and reduce blocking pieces to create the airfoil shape.


The bottom and aft edge blocking pieces.


The forward block is glued in place then the complete unit is saturated with undiluted epoxy.

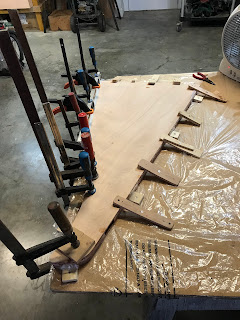
Glue is applied to all parts and assembled on a flat plastic covered bench.


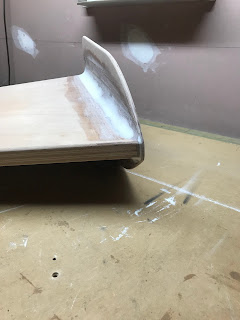
To ensure the rudders airfoil shape and to prevent epoxy slip I clamped an aluminum angle to the bench with a timber spacer beneath it. The thickness of the aluminum and the spacer combined held the trailing edge of the rudder the right height to ensure it is symmetrical. You can see the gap under the aft edge where it sits on the angle. 


The trailing edge is clamped down into the aluminum angle, I use a level between the clamps and the timber to ensure it is evenly flat along its edge.


Small blocks are screwed around the circumference of the rudder to hold in place. 

Using ply strips the base and forward part of the rudder are screwed down flat on the bench.


Here the rudder and end plate ready for cleanup.


I sat the rudder and end plate against the transom ensuring the bottom of the end plate is level with the bottom of the keel. Using a pencil through the tiller slot I marked the hole for the tiller.


This pic shows the location of the tiller slot which I used to measure and cut the 3" (76mm) tall and 3-1/4" (82.5mm) wide slot.


I drilled holes in each corner and removed the piece with a jigsaw before rounding the edges with a router. 


Using a 25mm diam forstner bit I drilled the two cockpit drainage holes. The holes were treated with undiluted epoxy and then a 25mm electrical conduit was glued into the drainage holes. I use this method to completely seal the transom timber plus it gives the drainage hole a neat finish.


This pic shows the conduit which is yet to be cleaned up flush with the transom.


And here the conduit is cleaned flush with the transom.


Before fixing the cheeks to the rudder I did the following:

1) I glued the two 9mm cheeks together to form a solid 18mm thick section.

2) I then temporarily screwed the two 18mm thick cheek sections together for shaping.

3) Using a chamfering bit on a router table I knocked the edges off the cheeks.

4) I routed channels for blue gum inserts.


This pic shows clamps holding the inserts in place until the epoxy sets.


The inserts are cleaned up with a spoke shave and sanded down level with the cheeks.

Note: The two cheeks are still screwed together during this whole process. I simply flipped the section over to do the other side.


And here are the completed cheeks with one coat of diluted epoxy, two more to be applied before lacquering bright. 


Friday, August 16, 2024

Tabernacle

 Another bench project


I cut a 42 mm thick section from a large piece of Hoop pine (above left) and milled it into the two 18mm thick side pieces (above right).
Page 250 of the manual suggests beefing up the tabernacle sides to 25mm thick. To do this I will laminate 9mm thick ply sections to the insides and run them through the thicknesser. When lacquered up the end grain of the laminated ply will look nice alongside the Hoop pine.


The 9mm plywood sections are cut slightly larger than the sides.

The mating surfaces are wetted out with undiluted epoxy.


And glued together with thickened epoxy. A plastic sheet was placed between the two clamped sections.


Clamps are removed, epoxy squeeze out cleaned up and the larger laminated ply is trimmed.
Next, I clamped the two tabernacle sides together and with a spirit level ensured it was horizontal on the drill press. Oversized holes are drilled for the mast and bowsprit bolts.
The two sides are reduced to 25mm in thickness and the whole unit is temporarily assembled.

I sat the assembled unit on the foredeck to ensure the base angle and the fillet fit OK.
A trial fit of the bowsprit into the tabernacle found it a bit too tight, probably due to the 3 coats of epoxy and the 500 coats of lacquer. So, because I intend to do lots of coats of lacquer on the mast I will need to widen the rear face by a smidgen. I simply added a layer of cloth to the edges to widen it. If this is too much, I can simply sand a bit off.

The oversize holes are filled with thickened epoxy.


Then the epoxy plugs are sanded down level with the sides.


The two identical sides are clamped together and leveled on a drill press; the smaller bolt holes are drilled in the center of the oversize plugs.


To add additional strength to the mast pivot area of the tabernacle I decided to add a small stainless-steel plate at the top. I just happened to have a thin sheet of stainless laying around the workshop screaming to be cut up. Nice to do a bit of metalwork for a change, reminded me of my high school years, yes, I can remember back that far.


Armed with an angle grinder, cutting disc and grinding disc I cut out the shape and smoothed it out.


With the plate sitting in place the pivot hole is marked from the inside.


The tabernacle is routed to enable the plate to sit flush, the pivot hole and four small securing holes drilled.


There are two things I want to do to the tabernacle to make it "Showy" as John says......


This is the first.

Routing two grooves in the tabernacle sides and inserting blue gum strips......following my build theme.


The second "Showy" will be revealed later.


Grooves are routed to a depth of 2mm.


Blue gum strips are epoxied in place.


Drainage channels are drilled in the base of the tabernacle using a rasp. 


The outside edge of the channel is routed with a round over bit, and trial fitted.


To locate the mounting bolts, I trial fitted the tabernacle hard against BH 2. A length of scrap timber was jammed between the tabernacle and the breast hook to hold it in place.
 From inside the cabin, I drilled two small pilot holes through BH2 into the tabernacle.  


Recess holes are drilled with a Forstner bit to the depth of the bolt head and washer. 8mm holes are drilled through BH 2 and the tabernacle.
Here you can see the hex head bolt, washers and dome nut that will secure the tabernacle to BH 2.


Time to assemble the tabernacle, two spacers are placed under the clamps to keep things square until the epoxy sets.


Plugs from blue gum are made to fill the drill holes.


and epoxied in place.


Monday, August 12, 2024

Glassing the Cabin Top

 Prior to glassing the cabin top I prepared the area.


All holes, fillets and construction dents were filled and sanded smooth using 120 grit discs on an orbital sander.


The area was given a good vacuum and wiped down with denatured alcohol. Using a felt tip marker I drew rings around all the grab rail screw holes so they would be easy to see and find after glassing.


I cut a 1500 mm length of 1040mm wide glass cloth.


The glass cloth is laid over the starboard side cabin top and smoothed in place with a gloved hand.


To give a neat edge I applied masking tape to the hull sides around the circumference of the cloth.


Using a large flat paint spatula, I poured and smoothed epoxy over the glass cloth starting in the center and working outwards. 


I used a total of 320 mls of epoxy in three separate batches to completely cover the area.


Next the port side is laid.


Moving forward it's time to fiberglass the Dorade boxes. 

A paper template is made as a cut out guide.


But before I lay the fiberglass, I will drill the holes for the mooring cleats. I'm using 6" or 152mm long 316 stainless steel cleats.


4 smaller holes drilled for a trial fit of the cleats. Then larger holes are drilled.


A syringe is filled with thickened epoxy.


The back of the holes are covered with masking tape.


And thickened epoxy squeezed into the larger holes.


After the epoxy has set the area is completely sanded. Smaller holes for mounting the cleats are drilled through the thickened epoxy and the area thoroughly cleaned.


A paper template is made for the fiberglass cloth.


The area is masked up and glassed.